Feathers, those intricate mosaics adorning our avian companions, are more than mere plumage. They are the sculpted tapestries that dictate flight, insulation, and captivating visual displays. To truly capture the essence of a bird in art, one must master the art of rendering feathers, transforming them from simple outlines into nuanced expressions of form and texture. This is not merely replicating a pattern; it is understanding the language of feathers and translating it onto the canvas.
I. The Architecture of a Feather: Decoding the Building Blocks
Before diving into the artistic application, a structural understanding is paramount. Each feather, a marvel of bioengineering, boasts a specific architecture. Consider it a blueprint for artistic accuracy.
A. The Rachis: A Feather’s Spine
The rachis, the central shaft, provides the feather’s rigidity and structural integrity. Observe its curvature, its thickness, and how it tapers towards the tip. A subtle bend can impart a sense of movement, a gentle sway in the breeze. The rachis is the anchor point; from it unfurls the rest of the feather.
B. Barbs and Barbules: Weaving the Feather’s Fabric
Extending from the rachis are the barbs, delicate filaments that form the feather’s vane. Each barb, in turn, is fringed with even finer structures called barbules. These barbules interlock with microscopic hooks, creating a cohesive, windproof surface. In your drawing, this translates to understanding the directionality and density of these elements. Indicate their collective direction to imply texture and form.
C. The Calamus: Where Feather Meets Flesh
The calamus, or quill, is the hollow base that anchors the feather to the bird’s skin. It is often obscured by other feathers, but its presence subtly affects the feather’s overall form. Account for its subtle influence in your depiction.
II. Feather Groupings: Mapping the Avian Landscape
Birds are not uniformly covered in the same type of feather. Understanding the different feather groups and their distinct characteristics is crucial for a realistic portrayal.
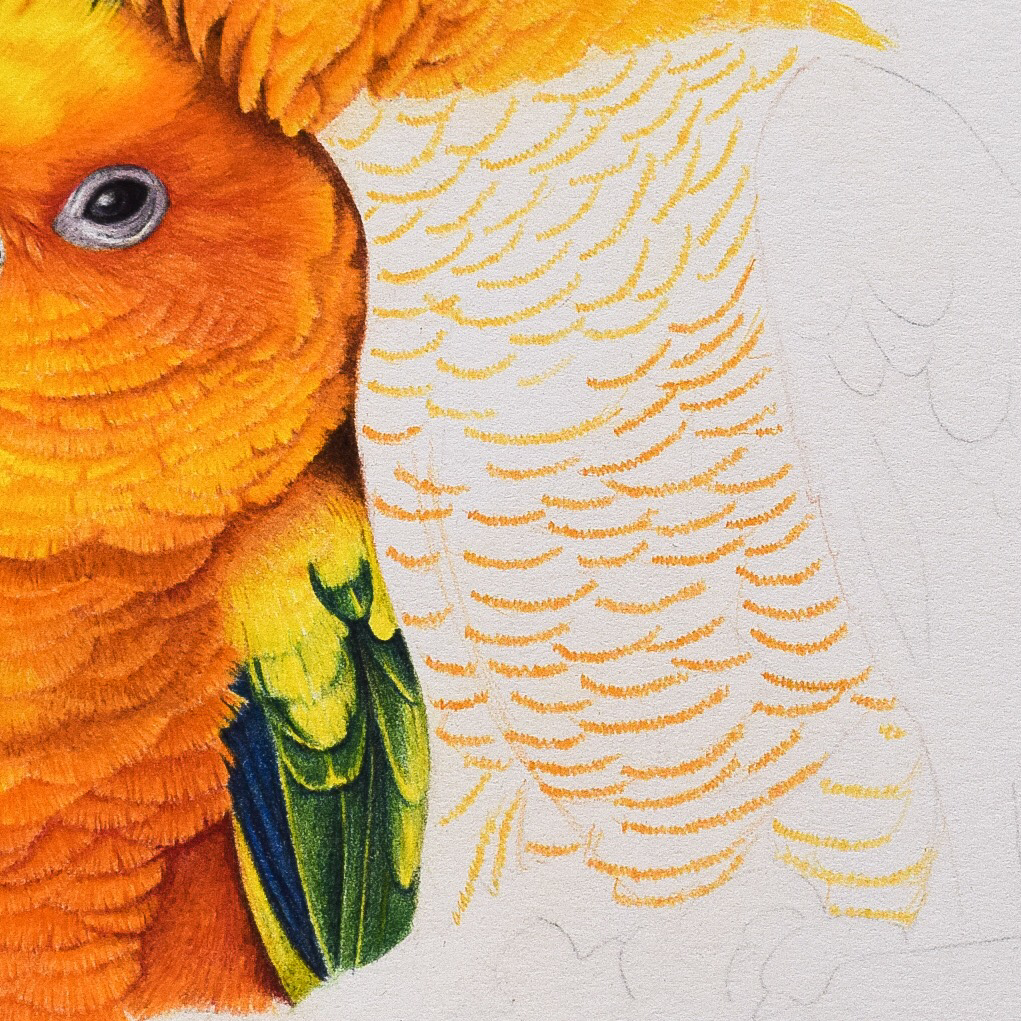
A. Contour Feathers: The Armor of the Sky
Contour feathers are the most visible, defining the bird’s outer shape. They are typically streamlined and closely packed, providing a smooth aerodynamic surface. These feathers often overlap, creating layered textures. Emphasize this layering with subtle variations in tone and line weight.
B. Down Feathers: The Insulating Undercoat
Beneath the contour feathers lies a layer of down feathers, soft and fluffy, providing insulation against the elements. These feathers lack a prominent rachis and have loose, disorganized barbs. Depict them with soft, diffuse strokes, suggesting their airy texture.
C. Flight Feathers: The Engines of Propulsion
Found on the wings and tail, flight feathers are specialized for generating lift and controlling flight. They are typically longer and stiffer than contour feathers, with an asymmetrical shape. Pay close attention to their arrangement and how they interact with each other to create a functional wing surface.
III. Techniques for Rendering Feathers: From Line to Shadow
Now, let’s translate this knowledge into practical drawing techniques. The approach will vary depending on your chosen medium, but the underlying principles remain the same.
A. Line Work: Establishing the Foundation
Begin by lightly sketching the overall shape of the feather, paying attention to the curve of the rachis and the general outline of the vane. Then, use delicate, flowing lines to indicate the direction of the barbs. Vary the line weight to create depth and dimension. Softer lines suggest areas that are further away or in shadow.
B. Shading: Sculpting with Light
Shading is key to creating a sense of volume and texture. Observe how light falls across the feathers, creating highlights and shadows. Use hatching, cross-hatching, or stippling techniques to build up tones gradually. Remember that the density of the shading should correspond to the intensity of the light.
C. Texture: Capturing the Finer Details
Adding texture is the final step in bringing the feathers to life. Use short, broken lines or tiny dots to suggest the individual barbs and barbules. Experiment with different techniques to create variations in texture, reflecting the different types of feathers. Remember, subtlety is key; avoid overworking the details.
IV. Practice and Observation: The Path to Mastery
Like any artistic skill, mastering the art of drawing feathers requires practice and careful observation. Study real feathers, photographs, and illustrations of birds. Pay attention to the subtle variations in feather structure, color, and texture. Experiment with different techniques and mediums to find what works best for you.
Remember, each stroke is an opportunity to capture the essence of these remarkable structures. The journey to rendering feathers with accuracy and artistry is a rewarding pursuit. Embrace the challenge, and allow your understanding to elevate your artistic expressions.